

Installing the Agent manually then adding that computer to Site Manager
Macrium Site Manager enables the central management of endpoints using a Macrium Agent. The Macrium Agent then communicates with the Site Manager server using a TCP connection, enabling the backups to be monitored and scheduled using the Site Manager server.
The remote installation of the Macrium Agent uses Windows File Sharing to copy the Agent installer to the target computer. In some scenarios, it may not be possible to perform the remote installation on an agent. In these scenarios, the Macrium Agent can be installed manually.
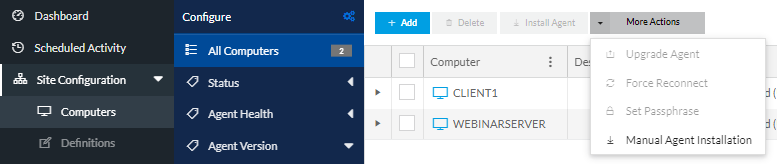
To install the Agent manually, you first need to download the Macrium Agent installers. These installers can be downloaded using the ‘More Actions’ drop down menu on the ‘Computers’ page of the Site Manager. In the drop down menu, select ‘Manual Agent Installation’
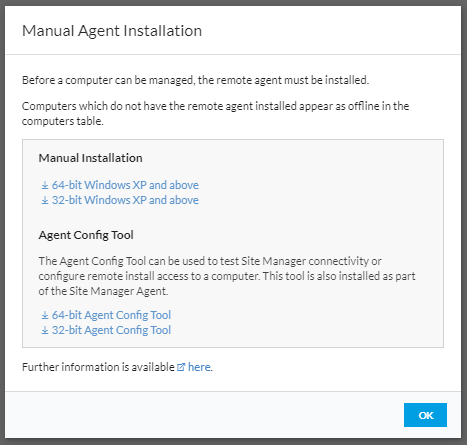
The window that opens will display the various download options. The ‘Manual Installation’ section is used to download the Macrium Agent installer which is then run on the target computer, the architecture that is chosen will depend on the target computer. The ‘Agent Config Tool’ is used to troubleshoot communication issues between the Agent and the Site Manager server, and specify connection details that are used to connect to the Site Manager. The Agent Config Tool is also copied to the target computer as part of the Agent installation, the Agent Config Tool can be found on the target computer at the following path, once the Macrium Agent has been installed:
C:\Program Files\Macrium\Agent\AgentConfigTool.exe
The downloaded installers will need to be accessible from the target computer. For example, you can copy the installers to a network share accessible from the target computer, or copy the installers to the target computer using a USB drive.
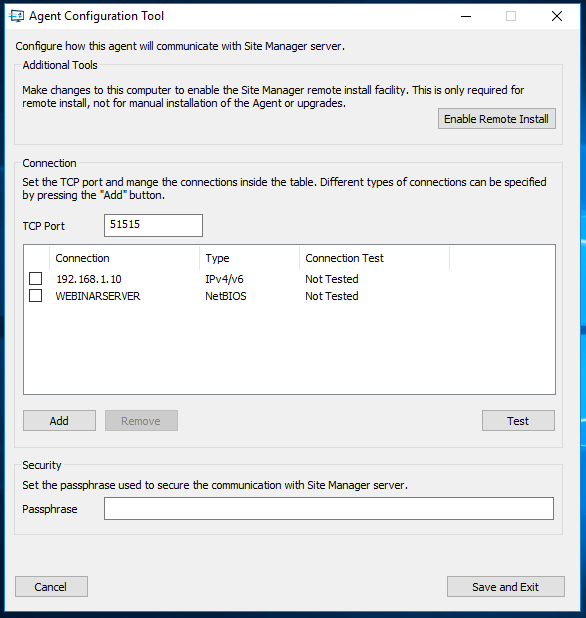
The installer can then be run on the target computer. Once the manual installation has completed, the Agent Config Tool will open automatically. If the computer has not connected to the Site Manager server before, the ‘Connection’ section of the Agent Configuration Tool will be empty.
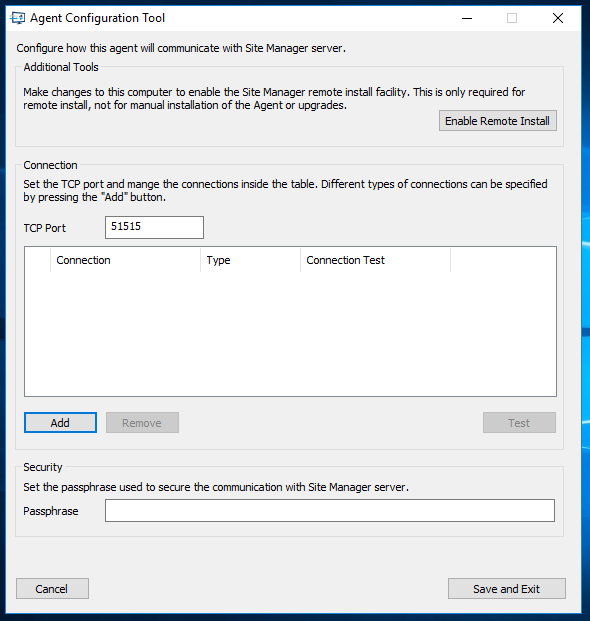
Select ‘Add’ to specify the connection details for the Site Manager server you are connecting to. Multiple IP addresses, DNS names and NetBIOS names can be added. The Agent will attempt a connection through each of these until it establishes a connection to the Site Manager server. If the connection is dropped, the Agent will retry all configured connection details until it can re-establish the connection.
Once you have specified the connection method(s), select ‘Add’. The connection method(s) that you have specified will then be shown in the ‘Connection’ section of the Agent Configuration Tool. The connection methods that you have entered will be shown as ‘Not Tested’, as they have not yet been tested to access the Site Manager.
To correct this, select ‘Test’. If the Agent Configuration Tool is unable to access the Site Manager using the connection method(s) that you have entered, they will appear as ‘Failed’ under the ‘Connection Test’ column. If the Agent Configuration Tool can successfully access the Site Manager using the connection method(s) that you have entered, they will appear as ‘Successful’ under the ‘Connection Test’ column. Only one successfully tested connection method is required for the Agent to communicate with the Site Manager. If all of the connection tests fail, then this may indicate that there is a communication issue between the Agent and the Site Manager, e.g. a firewall blocking the specified TCP port, or the incorrect details have been entered.
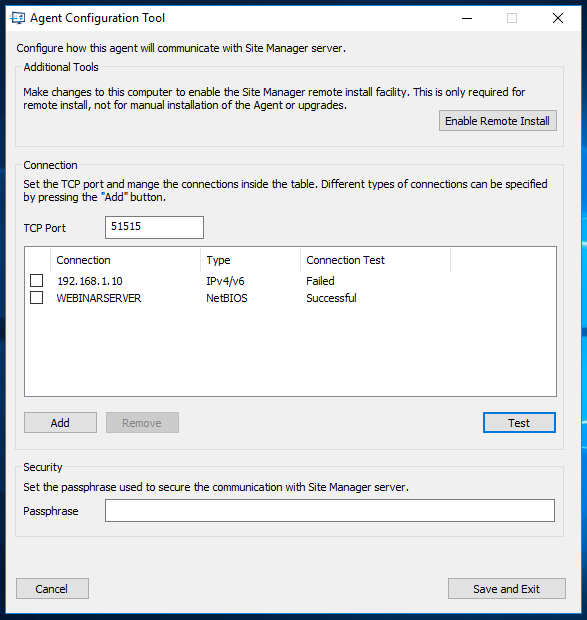
Once you have a successfully tested connection method, select ‘Save and Exit’. The settings that you have specified will then be written to the registry on the Agent computer and used by the Agent to connect to the Site Manager.
Next, open the Site Manager and select the ‘Add’ button on the ‘Computers’ page, this will open the ‘Add Computers’ wizard. Select ‘Add Computers Attempting to Connect’, to add the target computer to the Site Manager. The second page of the wizard will display the computers that are attempting to connect to the Site Manager, select the computers that you would like to add to the Site Manager and select ‘Next’. The final page of the wizard will show the result of these computers being added to the Site Manager.
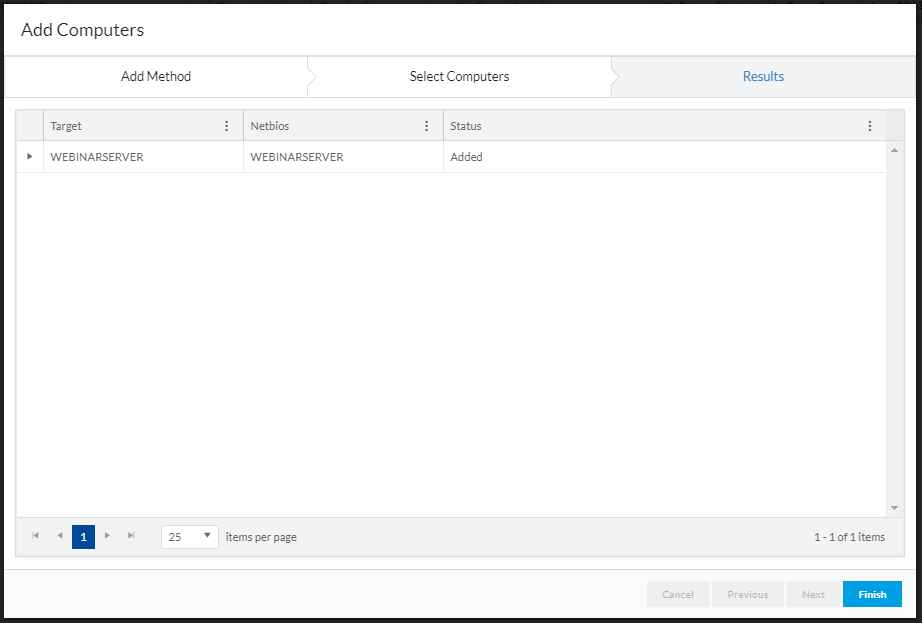
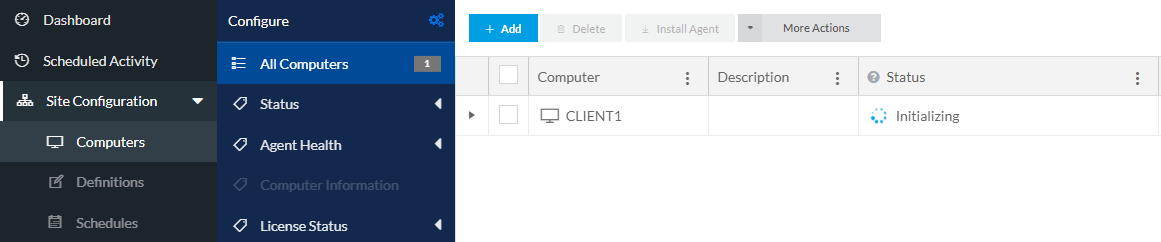
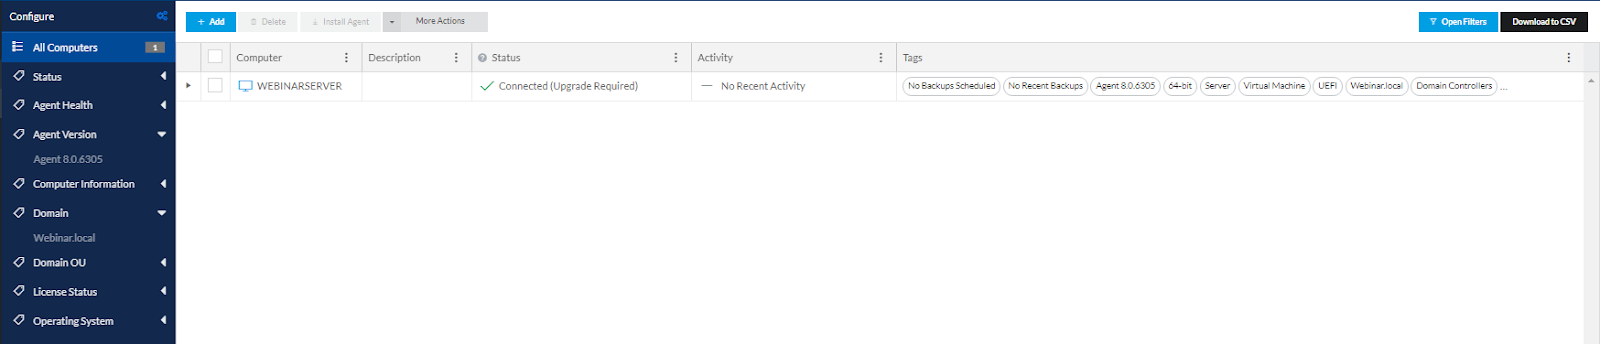
Select ‘Finish’ to close the wizard. The computer will then be shown in the ‘Computers’ page of the Site Manager:
For more information about installing the Macrium Agent manually, please refer to the Knowledgebase article linked below:
https://knowledgebase.macrium.com/display/MSM8/Agent+Manual+Install
The Site Manager MSI can also be deployed using third-party deployment tools. The MSI supports a number of command line switches that can be used to customize the installation and specify the Site Manager that the agent connects to. You can read more about these command line options and deploying the Site Manager Agent at the link below:
https://knowledgebase.macrium.com/display/MSM8/Deploying+Site+Manager+Agents+Using+SCCM
Blog posts in this series
Adding a computer and installing an Agent remotely
Installing the Agent manually then adding that computer to Site Manager
Definitions - What are they
Schedules - What are they
Repositories - What are they
Scheduling Backups with Macrium Site Manager
Browsing a repository and recovering a file
Restoring an image remotely using Macrium Site Manager

Site Manager - Schedules - What are they?
How do HDDs work?

