

Virtualization with Macrium Reflect — part 3
In the previous blog post in this series (Virtualization with Macrium Reflect — part 2), we outlined the necessary steps to take when migrating servers into a VMWare environment and how this can be easily achieved with Macrium Reflect. This article will detail the steps to take when migrating a physical server into a Citrix Xen Environment.
The steps below will detail how to convert a physical server to a virtual server using XenServer 7.4.0 and Macrium Reflect.
To convert our physical servers to virtual servers, you will only need two things. The first thing you need is the Macrium Reflect Rescue Environment ISO (a bootable environment we can use to restore images. The article linked below contains detailed steps on how to create your Rescue Media ISO:
The Macrium Rescue Environment
The second thing we need is an image of the physical server we are converting to a virtual server. It is advised that this image is stored in a network share, as this will make accessing the image from inside the Rescue Media easier.
Once you have both, you can begin converting your physical server to a virtual server. This post will be focusing on Citrix Xen, if you do not already have this configured, please follow the article below:
https://docs.citrix.com/en-us/legacy-archive/downloads/xs-installation-guide-7-4.pdf
The first step you will have to take is creating a virtual machine with your client using XenCenter. The image of your physical server will then be restored to this.
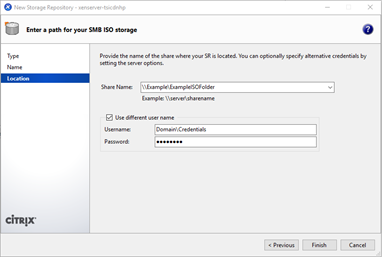
First, you will need to add the Rescue Media you have created to a SMB ISO Library. This will allow you to easily access your Rescue Media ISO when creating your virtual machine. Since we are using XenCenter on a Windows Operating System, we will be creating an ISO library using ‘Windows File Sharing’. To do this select ‘New Storage’ and then select ‘Windows File Sharing (SMB/CIFS)’. Once you have named your ISO library, you can then specify the location of your network share and use different credentials to authenticate against the share if necessary.
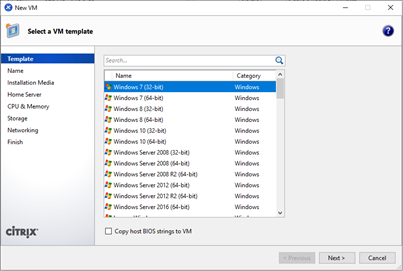
Once you have moved your Rescue Media ISO to the ISO library, you are ready to create your virtual machine, to do this select ‘New VM’.
Below is a brief overview of the different options available in the ‘New VM’ wizard:
Template — The available templates contain installation metadata, the information required to create a new virtual machine with a specific operating system. This metadata provides the virtual machine with the optimum storage, CPUs, memory and network configuration. In this example, the image I created was of a Windows Server 2016 installation, therefore I will pick the Windows Server 2016 template for my virtual machine.
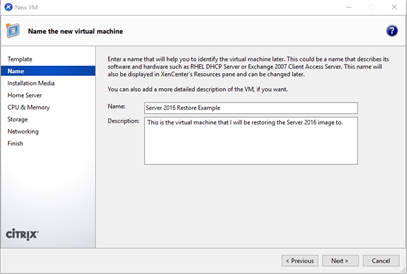
Name — The name page of the ‘New VM’ wizard allows you to enter a name and description for your virtual machine. This allows you to easily identify the virtual machine.
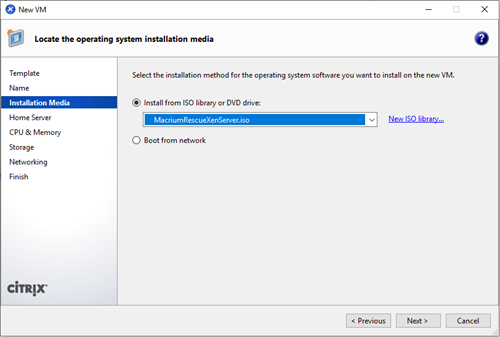
Installation Media — This page of the wizard allows you to select a media that will be used to install the operating system on your virtual machine. Select ‘Install from ISO library or DVD drive’ and select your Rescue Media ISO listed under the library that you created earlier. Once the virtual machine is started, it will then boot into the Rescue Media ISO.
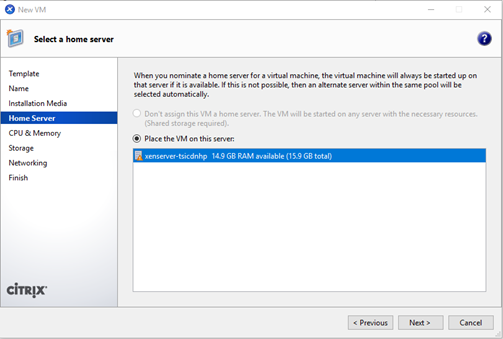
Home Server — This page of the wizard allows you to designate a server that the virtual machine will be started on by default. If the selected home server is unavailable, then the virtual machine will be started on a different server in the same pool.
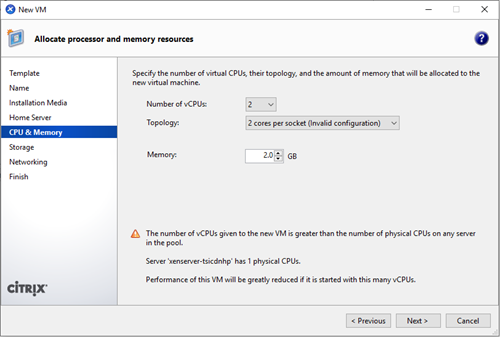
CPU and Memory — You can use this page of the wizard to customise the virtual hardware of the virtual machine. This includes the number and configuration of CPUs that will be assigned and the amount of memory that will be available. These settings will vary depending on the purpose of the server that is being virtualised and the hardware resources that are available. The default values are based on the template that you selected.
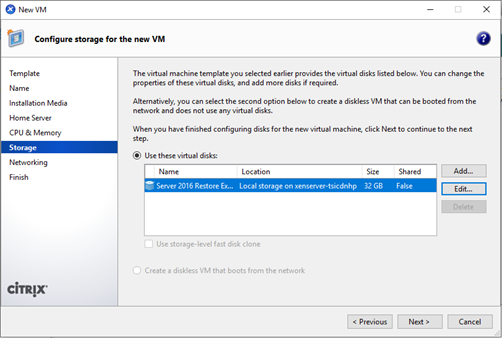
Storage — The storage page of the wizard allows you to configure how much storage will be available to the virtualised server. This will depend on the purpose of the server and the size of the used disk space in the image that you have taken. If the used disk space in the image does not exceed the size of your virtual disk, you will be able to restore your image.
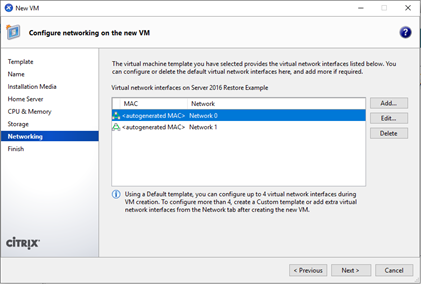
Networking — Using this page of the wizard, you can configure the network adapters that will be added to the virtual machine. These will be automatically generated by template you selected earlier in the wizard and will have an automatically assigned MAC address. However, these default adapters can be edited or deleted. Since the image I will be restoring is located on a network share, I will be leaving the adapters with their default settings.
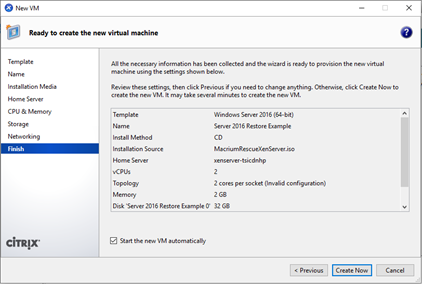
Finish — The final page of the wizard will give you a detailed overview of the virtual machine that you are about to create. Once all the settings have been double-checked, select ‘Create Now’ to create the virtual machine.
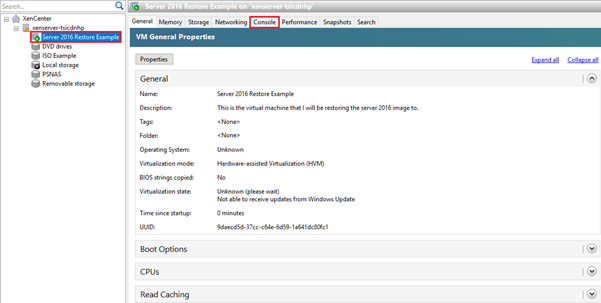
Now that the virtual machine has been created, you can select it from the list of options below your XenServer. Once you have selected your virtual machine, select console to begin using the virtual machine.
Once the virtual machine has been launched, it will boot into your Rescue Media. You can now begin restoring the image of your physical server to your virtual server. This can be done by navigating to the ‘Restore’ tab and selecting ‘Browse for an image file…’. You will then be able to ‘Map a Network Drive’ where the image is stored.
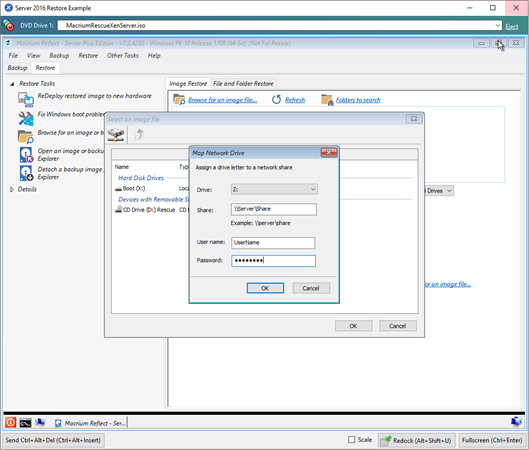
Once the credentials have been entered, select ‘OK’, open the drive and select your image. Your image will then be shown in the ‘Restore’ tab, with details about the image, and the partitions that are included in the image. You are now able to restore this image to the virtual machine.
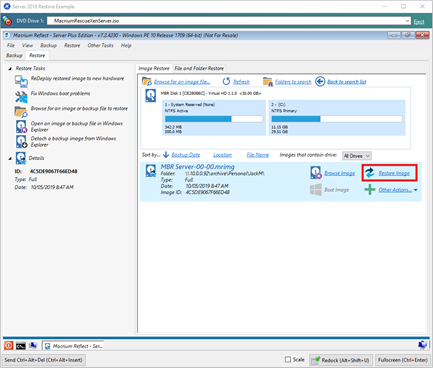
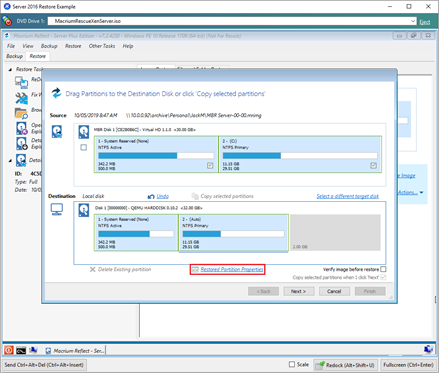
Once you have selected the ‘Restore Image’ option, you are presented with the restore wizard. You can then select ‘Copy selected partitions’ or manually drag the partitions from the source to the destination. Once the partitions are on the destination disk, you can select ‘Restored Partitions Properties’ to change the size and drive letter assignment for the partition.
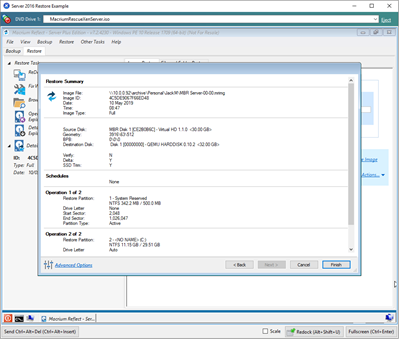
Once you have finished editing your partitions, select ‘Next’. You will then be presented with a detailed ‘Restore Summary’ which shows the operations that will be undertaken when restoring your image. Once you have reviewed the summary, select ‘Finish’ to start your restore!
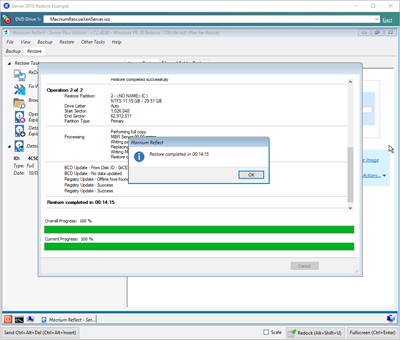
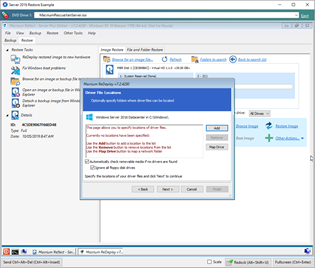
Once the restore has completed, you now need to run Macrium ReDeploy. ReDeploy detects changes to critical system features, locates relevant drivers and injects them into your Windows operating system, allowing it to boot. For more information about Macrium ReDeploy, please see the article linked below:
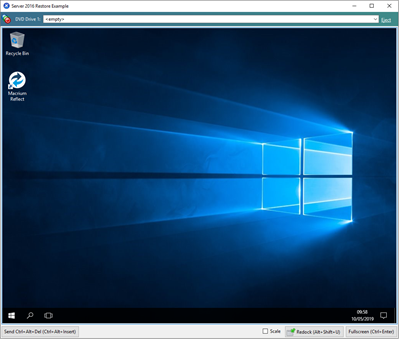
Once ReDeploy has been run, you can eject the Rescue Media ISO and boot into your restored Server Operating System.
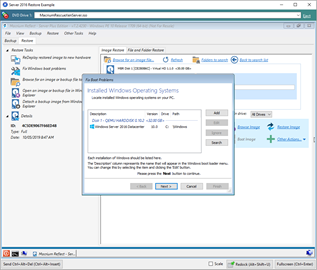
If you experience any issues booting into your Restored Server Operating System, boot back into the Rescue Media, and run ‘Fix Windows boot problems’, which will fix common issues that can prevent a restored image from booting. For more information about ‘Fix Windows boot problems’ and how to use it, please see the article linked below:
https://knowledgebase.macrium.com/display/KNOW72/Fixing+Windows+boot+problems
You now have a visualized server!
To run Fix Boot Problems, the Rescue Media must be booted in the correct mode for your disk. If your disk is GPT the Rescue Media must be booted in UEFI mode, if the disk is MBR it must be booted in legacy mode.
Citrix Xen does not fully support UEFI boot meaning that Fix Boot Problems cannot be run on GPT disks, therefore it is advised that the above steps are only used when migrating an MBR disk to a virtualized server.
The following article details how to restore a GPT disk to an MBR disk, Fix Boot Problems can then be run on your destination of the restore.:
https://knowledgebase.macrium.com/pages/viewpage.action?pageId=23396933
For further information on Citrix Xen UEFI support, please contract Citrix Xen directly.
You can download a 30-Day Trial of Macrium Reflect Home, Workstation, Server, Server Plus, or Site Manager.

Site Manager Update
What else can I do with WinPE?

