

Virtualization with Macrium Reflect — Part 4
In the previous blog post in this series (Virtualization with Macrium Reflect — Part 3), we outlined the necessary steps to take when migrating servers into a Citrix Xen environment and how this can be easily achieved with Macrium Reflect. This article will detail the steps to take when migrating a physical server into a Proxmox Virtual Environment.
The steps below will detail how to convert a physical server to a virtual server using Proxmox Virtual Environment 6.0–4 and Macrium Reflect.
Proxmox Hypervisor is an open-source virtualisation environment that allows the creation of virtual machines and containers. Proxmox includes a web interface, making the management and deployment of virtual machines extremely easy from anywhere on your network. Promox uses Kernel-based Virtual Machine (KVM) virtualization, essentially turning the Linux installation into a hypervisor, acting closer to a Type 1 Hypervisor (bare-metal) than a Type 2 Hypervisor. This comes with several advantages:
Security — Type 1 Hypervisors are more secure. The security concerns that are endemic to
Operating systems are missing from Type 1 Hypervisors, reducing the attack vector that can be used to compromise a system and the virtual machines it contains.
Efficiency — Type 1 Hypervisors are also more efficient. When using a machine for strictly virtualization, a host OS becomes unnecessary, consuming system resources that could otherwise be available to the virtual machines. A Type 2 Hypervisor (e.g. Virtual Box) must be installed on top of an operating system, by removing the need for the operating system, you free up more resources for the virtual machines you want to create.
However, at the time of writing Proxmox hypervisor does not fully support UEFI booting. To run ‘Fix Windows Boot Problems’, the Rescue Media must be run in the correct mode for your disk. If the disk is GPT the Rescue Media must be UEFI booted, if the disk is MBR the Rescue Media must be Legacy MBR booted. This means that it is not possible to boot the Rescue Media in the correct mode to run Fix Windows Boot Problems on a GPT disk. Therefore, it is advised that the steps outlined in this article are only used when migrating a server, that has an MBR boot disk, to a virtualised server.
Alternatively, you can restore your UEFI/GPT system image to a legacy MBR disk. This will allow you to legacy boot the restored image. More information on this can be found at the article below, these steps should be followed when restoring the image from inside the Rescue Media ISO:
https://knowledgebase.macrium.com/pages/viewpage.action?pageId=7734460
If you have not already configured Proxmox, a detailed Admin Guide is available on their website that details how to configure Proxmox up to the point where a Virtual Machine can be created for us to restore our image to:
https://www.proxmox.com/en/downloads
To convert our physical servers to virtual servers, you will only need two things. The first thing you need is the Macrium Reflect Rescue Environment ISO (a bootable environment we can use to restore images. The article linked below contains detailed steps on how to create your Rescue Media ISO:
The Macrium Rescue Environment
The second thing we need is an image of the physical server we are converting to a virtual server. It is advised that this image is stored in a network share accessible to the Proxmox host, as this will make accessing the image from inside the Rescue Media easier.
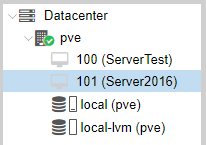
The first step to take is adding our Rescue Media ISO to the local storage on the Proxmox host. To do this, select ‘Local (node name)’ under the relevant node you want the ISO to be stored on. In our example the node is called ‘pve’.

Next, select ‘ISO Image’ next to storage and then ‘Select File…’. You can then navigate to where your Rescue Media is located and select ‘Upload’. This will add your Rescue Media ISO to the local storage of the Proxmox host.

Once the ISO has been added to the local storage, you are ready to create your virtual machine. To do this, select ‘Create VM’, this will open the ‘Create: Virtual Machine’ wizard, allowing you to configure the settings for your virtualized server.
Below is a brief overview of the different options available in the wizard:
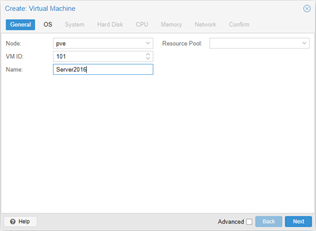
General — This page of the wizard allows you to configure the general settings for your virtual machine. These include the virtual machine’s display name, the ID and the node that which host the virtual machine (in the case of multiple nodes being configured).
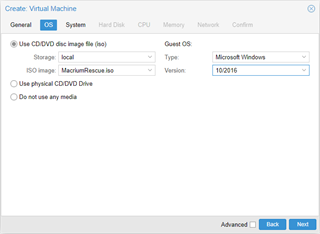
OS — The next page of the wizard allows you to choose an ISO file that the virtual machine will use to boot initially. Select ‘Local’ from the ‘Storage’ dropdown menu and select your Rescue Media ISO. This will boot the virtual machine into the Rescue Environment when it is turned on, allowing us to restore our image. You can also define the ‘Guest OS’, since our image is of a Windows Server 2016 OS, we will pick these options. Select the options most relevant to the Server that you imaged.
System — In this page you can select the virtual graphics card and SCSI controller that your virtual machine will use. We will be leaving these as default.
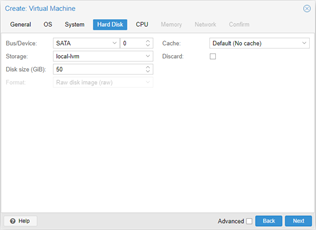
Hard Disk — On the ‘Hard Disk’ page of the wizard, you can select settings for the disk that your virtual machine will be booting from. Select the settings that are most relevant for the server that you imaged. Since our server used SATA drives, we will select SATA as the Bus/Device and a disk size of 50 GiB.
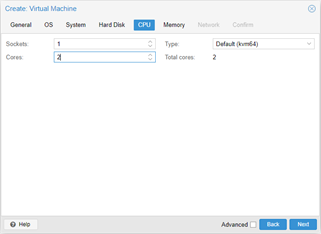
CPU — You can now select the settings for your virtual CPU. Your choices here will depend on the hardware that is available to the node you select, and the role your server will be performing.
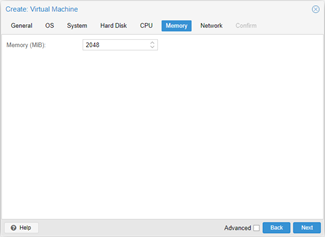
Memory (MiB) — You can now specify how much virtual memory will available to your server. Your choice here will again depend on the role the server will perform and the memory available to the node. You will not be able to virtualize hardware with more memory than the system has available.
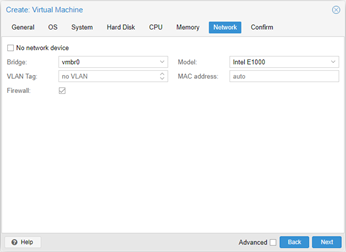
Network — Next, select the network settings for your virtual server, including the virtualised network adapter. Since our image is stored on a network share, we will add a network adapter.
Confirm — The final page of the wizard will give you a detailed overview of the virtual machine that you are about to create. Once all the settings have been double-checked, select ‘Finish’ to create the virtual machine.

Now that your virtual machine has been created, you can select it from the list of available virtual machines under the node you selected.
Select ‘Start and the virtual machine will automatically boot into the rescue environment. Select ‘Console’ to open the display and begin interacting with the virtual machine.

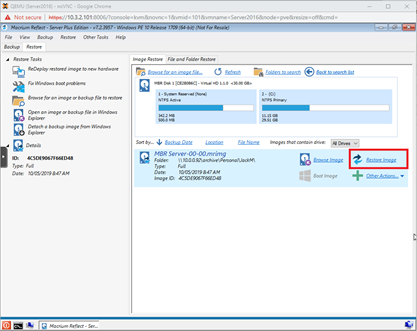
You can now begin the process of restoring the image of your physical server to your virtual server. This can be done by navigating to the ‘Restore’ tab and selecting ‘Browse for an image file…’. You will then be able to ‘Map Network Drive’ of where the image is stored.
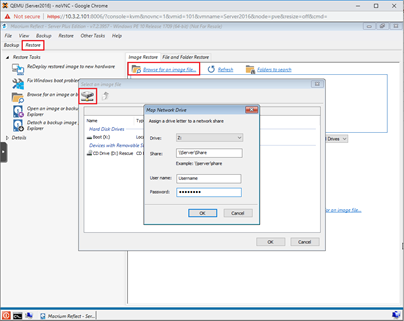
Once the credentials have been entered, select ‘Ok’, open the drive and select your image. Your image will then be shown in the ‘Restore’ tab, with details about the image and the partitions it includes. You can now restore this image to your virtual hard disk.
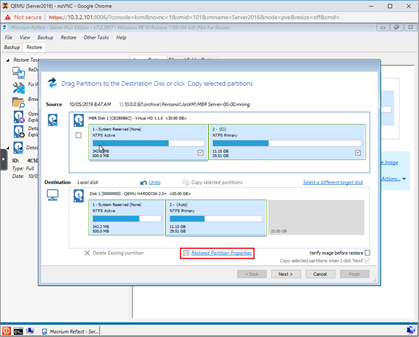
Once you have selected the ‘Restore Image’ option, you are presented with the restore wizard. You can then select ‘Copy selected partitions’ or manually drag the partitions from the source to the destination. Once the partitions are on the destination disk, you can select ‘Restored Partitions Properties’ to change the size and drive letter assignment for the partition.
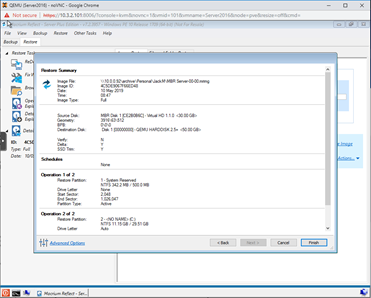
Once you have finished editing your partitions, select ‘Next’. You will then be presented with a detailed ‘Restore Summary’ which shows the operations that will be undertaken when restoring your image. Once you have reviewed the summary, select ‘Finish’ to start your restore!
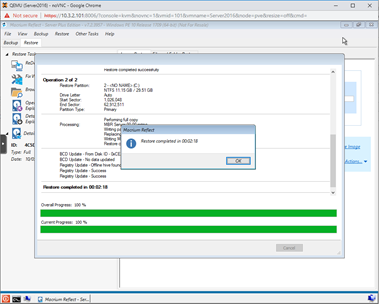
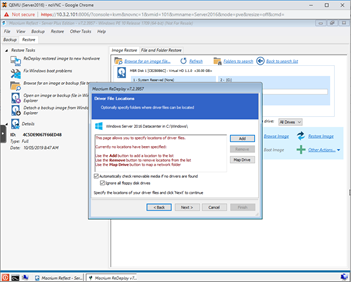
Once the restore has completed, you now need to run Macrium ReDeploy. ReDeploy detects changes to critical system features, locates relevant drivers and injects them into your Windows operating system, allowing it to boot. For more information about Macrium ReDeploy, please see the article linked below:
Once ReDeploy has been run, you can eject the Rescue Media ISO and boot into your restored Server Operating System.
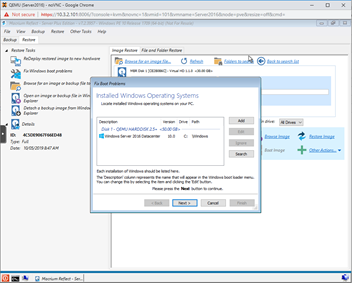
If you experience any issues booting into your Restored Server Operating System, boot back into the Rescue Media, and run ‘Fix Windows boot problems’, which will fix common issues that can prevent a restored image from booting. For more information about ‘Fix Windows boot problems’ and how to use it, please see the article linked below:
https://knowledgebase.macrium.com/display/KNOW72/Fixing+Windows+boot+problems
You now have a virtualized server!
You can download a 30-Day Trial of Macrium Reflect Home, Workstation, Server, Server Plus, or Site Manager.

How to schedule a backup using Site Manager
Advanced Backup Techniques

